After my Raspberry Pi powered door alarm I thought about implementing a temperature monitoring system with the Raspberry. I just found out about 1wire support on the Raspberry Pi a few weeks ago and wanted to try it myself.
After you've finished this tutorial you'll have a cheap temperature monitoring Raspberry pi with a nice zoomable, live updating web UI with as many sensors as you wish and even from remote networks like this (german):
The hardware
You'll need the following things:
-
A Raspberry Pi with raspbian Other systems might work too but I'm only familiar with raspbian at the moment
-
One or more temperature sensors I bought a 1 wire temperature sensor for about 5€. It has 3 wires but the data uses just one wire. I bought this one (sheet in german) which has a DS18S20 sensor inside.
-
One 4.7k Ohm resistor We'll be needing this to keep our raspberry GPIO ports from frying
-
One screw terminal with 3 pins I'm using this because it's the easiest way to reuse cables and sensors because they don't have to be soldered.
Let's build it
Step 1: The screw terminal
This will actually be the shortest part. Since I'm using the screw terminal all we'll need to do is solder (or connect somehow) the resistor between the left and center terminal like this:

Step 2: Connect the wires
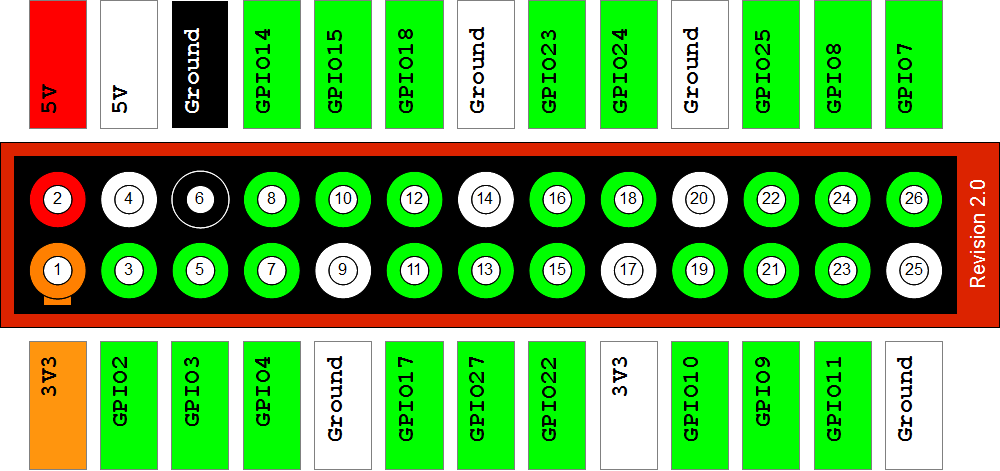
(GPIO Pin numbers acording to this graph, "=>" means connect to)
-
GPIO 1 => +3.3V on the Terminal
-
GPIO 6 => GND on the Terminal
-
GPIO 7 => DATA on the Terminal
-
- Wire of the sensor => +3.3V on the Terminal
-
- Wire of the sensor => GND on the Terminal
-
DATA wire of the sensor => DATA on the Terminal
The hardware is now ready!
The software
First we'll have to tell the kernel that we'll be using the 1 wire communication. We do this by editing (as root) /etc/modules and adding the following lines:
/etc/modules
wire
w1_gpio
w1_therm
After a restart we check if the sensor was found with this command:
ls /sys/bus/w1/devices If everything worked you'll see something like this:
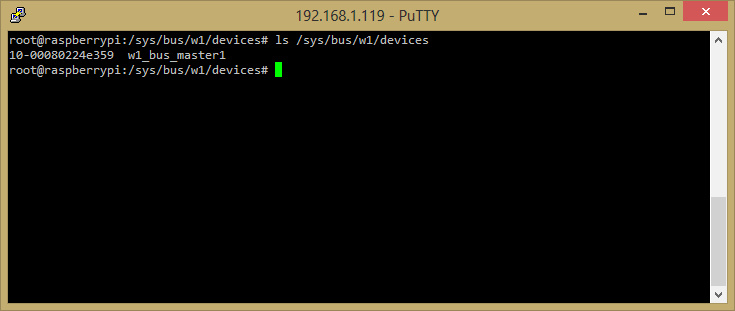
If you only see the w1_bus_master1 folder that means your sensor was not recognised by the system. Check your wires and if you connected the + and - cables correctly. If you see another folder (in my case it's 10-00080224e359) you're ready to get data from your sensor! Every sensor has a different ID so yours will be different from mine! Keep that in mind when you copy the commands!
Next lets see if it's really working by reading the w1_slave file inside your sensors directory:
cat /sys/bus/w1/devices/10-00080224e359/w1_slave 
The temperature is right in this file at t=28750 which means 28.750°C (damn you, heatwave) You can now log your temperature inside or outside (or even in water if your sensor is water proof)

Comment using SSH! Info
