This post will be a complete tutorial on how to setup a home security system consisting of multiple Raspberry PI's which will be livestreaming video from the Pi cams and a central machine will use it to check the feeds for specific objects (mainly cars and people) and will report it to you.
Things you'll need:
- As many Raspberry PI's as you want to have security cameras
- Raspberry Pi camera module or some USB webcam that works with the Pi
- A dedicated computer with an Nvidia GPU (I'll be using a GTX 970) running Debian
- A USB Drive for installing Debian on the computer
- Motivation
Step 1: Setup the Raspberry Pi(s)
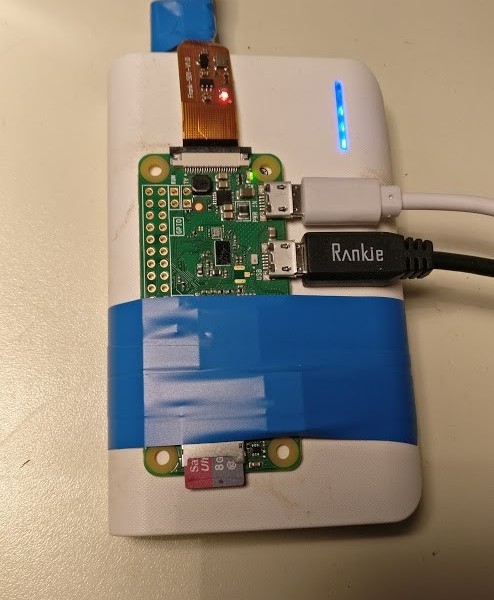
First download and install the latest Raspbian lite to your Pis SD card from the official site. You can use the normal one too but we won't need a GUI so lite will be good enough for us.
Prepare the Pi
It's not absolutely necessary but I highly recommend using THIS TUTORIAL to make the boot system of the Pi read only.
If you have played with the Pi before you might be aware that they can kill SD cards very easily when the power goes out while they were running. I lost many SD cards in the beginning but since I've made my RasPis read only with the tutorial above I have not lost a single card even though I always disconnect the power when they're running.
Also don't forget to run sudo raspi-config and enable the Pi camera module under "interfaces". Also you should expand your SD card
Install the streaming software
The following script will prepare your Pi to use the v4l2rtspserver to stream your cam.
If you followed the linked tutorial about making the pi read only remember to switch your pi to read-write mode before starting this script
One last step before we can test it. The script generated a file called /root/stream.sh and you'll need to add it to autostart so the Pi will start streaming when it reboots.
Edit /etc/rc.local and add the following line BEFORE THE exit 0 line!
nohup /root/stream.sh > /var/log/stream.log 2> /var/log/stream.err &
Now reboot the pi
Test the stream
Open the VLC media player, go to Media -> Open Networkstream and enter: rtsp://ip.addr.of.your.raspi:8554/unicast
You should see your cam now
Awesome, we're half way through!
Step 2: Setting up the Deep Learning machine
We'll be using the most awesome implementation for Deep Learning from https://pjreddie.com called darknet
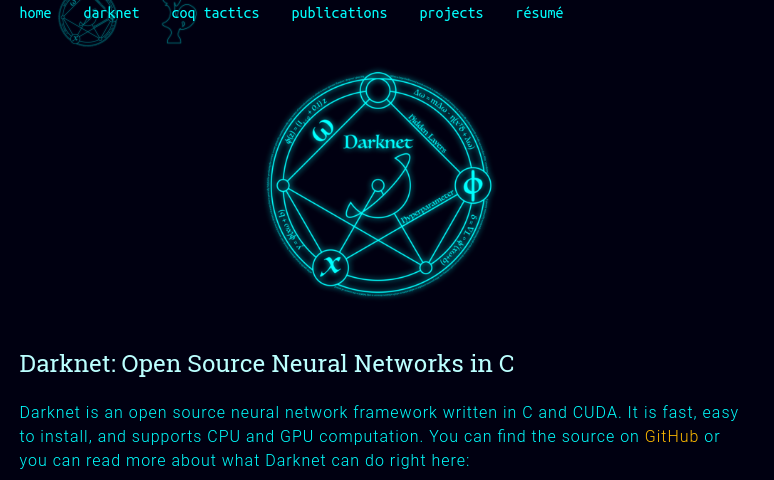
This is normally very complicated because we need to install CUDA for this to make sense. It would work without CUDA but instead of 15 frames per second you could only analyze one frame in 15 seconds. Not good for a security system.
To make things easier we'll do it with a fresh install
Installing Debian Buster
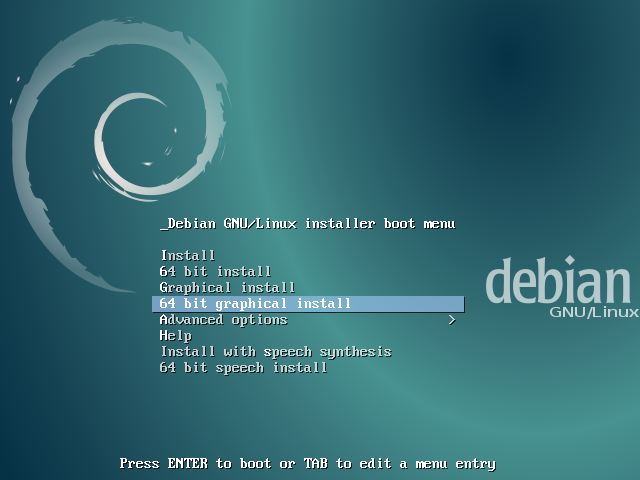
https://cdimage.debian.org/cdimage/weekly-builds/amd64/iso-cd/debian-testing-amd64-xfce-CD-1.iso
Install it on your computer. You don't need any fance things. Desktop environment with XFCE enabled will be fine for us to start.
Install nvidia drivers
Debian Buster has the current(ish) drivers right in their repo so all we need to do is install them via apt together with some other things we're going to need
apt-get install -y nvidia-driver nvidia-smi git build-essential cmake g++ gfortran python-dev wget gcc-6 g++-6 libopencv-dev python-opencv
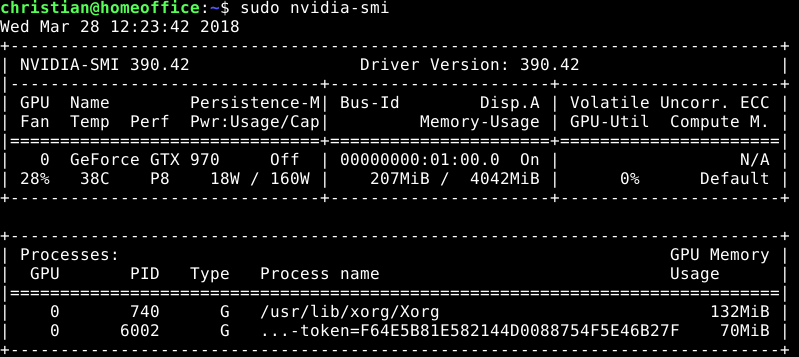
After that you can check if your card has been recognized with the following command nvidia-smi. A reboot might be necessary
Install CUDA
This part is the hardest part since it's different for every OS and it tends to break things when done incorrectly.
Execute all of the following commands as root or via sudo
cd /tmp/
wget https://developer.nvidia.com/compute/cuda/9.1/Prod/local_installers/cuda_9.1.85_387.26_linux
chmod +x cuda_9.1.85_387.26_linux
./cuda_9.1.85_387.26_linux --override- accept the license
- YES if asked to install on unsupported configuration
- NO when asked if you want to install the CUDA drivers
- YES when asked about the toolkit. Default location will be fine
- YES when asked about the symlink
- YES when asked about the samples. Default location is ok
Then we'll have to add the library path to your PATH variable so the compiler can find the tools
export PATH=/usr/local/cuda/bin${PATH:+:${PATH}}
export LD_LIBRARY_PATH=/usr/local/cuda/lib64:$LD_LIBRARY_PATH
That's it! Cuda should be working now. Will test in a bit
Installing darknet
Darknet supports YOLO (you only look once) classification which means you can give it one image, video or stream and it can detect objects right out of the box. Perfect for this project!
First get the library
cd $HOME
git clone https://github.com/pjreddie/darknet.git
cd darknet
If you want to analyze the images 500+ times faster, you'll have to edit the Makefile and change the first line from GPU=0 to GPU=1 and you optinally also can set OPENCV=0 to OPENCV=1 if you plan on using darknet with a local webcam. It's not needed for this project though.
Because the compiler of Debian Buster is too new we installed gcc and g++ version 6 too before. Now we'll have to link them to the compiler and load the nvidia driver module for cuda.
sudo ln -s /usr/bin/gcc-6 /usr/local/cuda/bin/gcc
sudo ln -s /usr/bin/g++-6 /usr/local/cuda/bin/g++
ln -s /usr/local/cuda/lib64/stubs/libcuda.so /usr/local/cuda/lib64/libcuda.so.1
sudo modprobe -v nvidia-uvm
Finally we can build darknet
makeThis will take some time..
Testing darknet
cd $HOME/darknet
wget https://raw.githubusercontent.com/pjreddie/darknet/master/cfg/yolov3.cfg -P cfg/
wget https://pjreddie.com/media/files/yolov3.weights
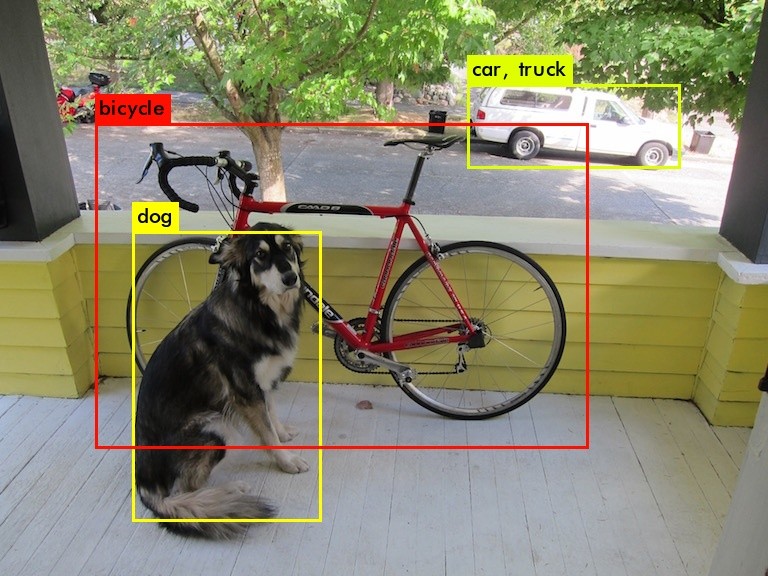
./darknet detect cfg/yolov3.cfg yolov3.weights data/dog.jpgThis should output in the end something like this
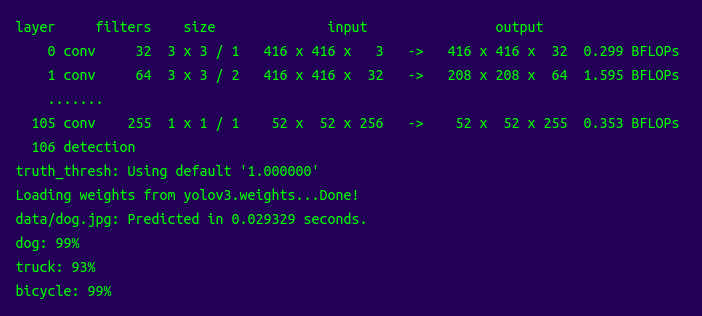
Also it should create a file called predictions.jpg in the darknet directory which renders the image with information on where something is
Final Step: Analyze the videostream
Darknet already comes with a python support so we'll just have to get images from the stream and analyze them.
Load the stream at 2 FPS
First we'll create a RAM disk where we will store the images. Since we're writing images to the disk 2 times per second we don't want our SSD or HDD to wear out.
sudo mkdir /tmp/ramdisk
sudo mount -t tmpfs -o size=16M tmpfs /tmp/ramdisk/
Then we're going to start ffmpeg and grab 2 frames per second and writing them to /tmp/ramdisk/frame.jpg. You'll have to leave the terminal window open for this test
ffmpeg -y -rtsp_transport udp -i rtsp://ip-of-your-raspberry:8554/unicast -f image2 -s 640x480 -pix_fmt yuvj420p -r 2 -update 1 /tmp/ramdisk/frame.jpgGet the script
Download this script into the darknet folder directly. Everything should work and if you start it you should see the classifications of your live stream
cd ~/darknet
wget https://gist.githubusercontent.com/geek-at/9ba20c4a9431164e8262d77d338b0748/raw/ea94d4a29bf6b9c5812b26844d494649800d7e2d/raspi-security.py
python raspi-security.pyWhere to go from here
If everything works you now have a security system that can detect objects and people. You can adapt the raspi-security.py script to notify you when a person comes into view or to count people, etc.

Comment using SSH! Info