If you've ever thought of building a file server, you probably had one or more of these thoughts
- Do I really need to waste one disk for the operating system?
- I only have old hardware with limited RAM, can I still use it as a file server?
- If someone steals my equipment, how can I make sure they won't have access to my data?
- How can I set up a samba share that will allow my windows computers to access the data?
- I don't have a display to connect to my file server. How can I do it all headless?
- Is software raid any good? What about ZFS?
Well, wonder no more!
We're going to build a system that will handle all those things!
The Plan
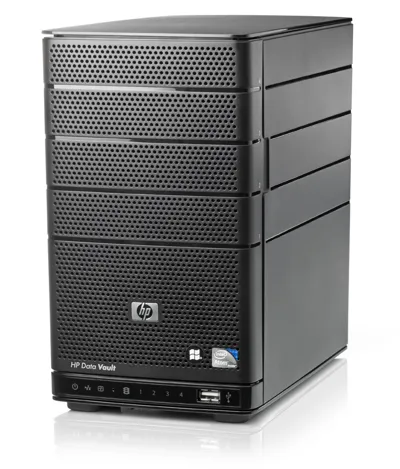
My motivation for this was, that I inherited an HP Data Vault x312 from my neighbor who died recently and this device is pretty old, has an Intel Atom d510 with only 2 GB of RAM and no display. It was meant to be used with Windows Home Server. My goal is to use it as an encrypted storage pool for backups running headless Alpine Linux.
1. How are we going to boot?
As in my previous server related posts, my choice of operating system for file servers is Alpine Linux because it's so damn small (ram usage after boot will be ~100mb), fast and has a ton of up to date packages we're going to be using.
Also it can be configured to run from a RAM disk with configuration stored on a USB drive. Which is exactly what we're going to do.
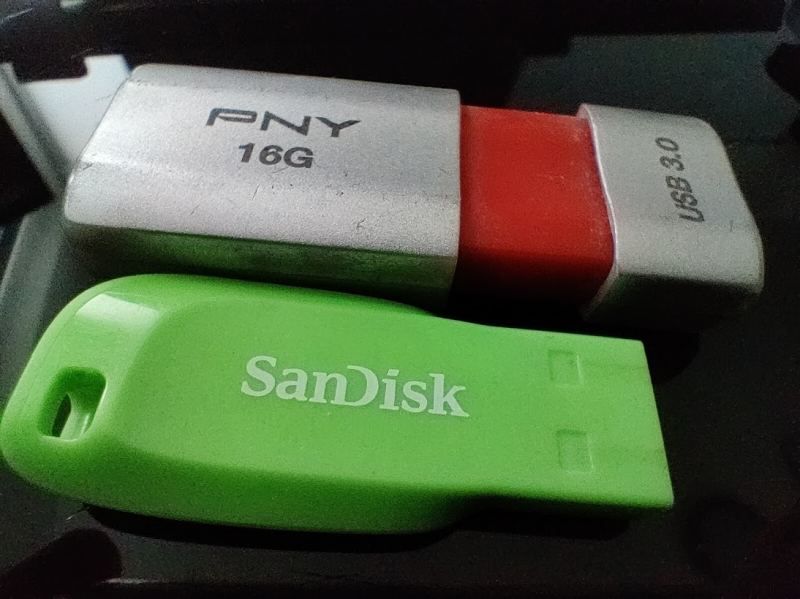
You're going to need 2 USB drives
The size doesn't really matter, I'm using two 16G drives. They don't even have to be USB3, it won't make a difference.
Why two?
We're going to put the ISO of Alpine Linux on one of them and boot it. Then we're using it to create the second one (which will be the one we're actually putting in our server).
Flashing the USB
Go to https://alpinelinux.org/downloads/ and download the latest x68_64 EXTENDED ISO and flash it to one of the USB drives using dd or some other etcher program.
Command if you're using dd like a pro: dd if=/path/to/your/alpine-extended.iso of=/dev/sdx where sdx is the device name of your USB drive. If unsure run lsblk | grep disk it will show you the device names and sizes for all connecte drives.
Booting the install USB drive
This can still be done on one of your devices and not on the file server. We're just preparing the USB installer here.
Plug your freshly flashed USB in a computer or laptop and boot it. You should see this screen
![Freshly booted Alpine Linux]()
Enter root and press enter, you're now logged in.
Preparing the USB drive for the file server
Now is a good time to look at the out put of fdisk -l | grep Disk to see which disks are found.

Now plug in the second USB drive and run fdisk -l | grep Disk again to see which device name it has.
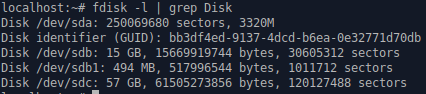
Great now we have to set up the new USB correctly: fdisk /dev/sdc (use the device name of your USB drive)
Now we're in fdisk. We'll empty the USB drive and create a partition that will host the image and configuration.
Press the following keys in fdisk:
o -> enter
n -> enter
p -> enter
1 -> enter
enter (when asking for first sector)
enter (when asking for last sector)
a -> enter
1 -> enter
w -> enter
now if you run fdisk -l /dev/sdc you should see the new layout like this

Now we format the new partition FAT32 and install the system from our booted USB drive
mkdosfs -F32 /dev/sdc1
setup-bootable /media/sdb /dev/sdc1
Note: /media/sdb should already be mounted, it's the file system of the live USB you're using. It might have a different name, check df -h to see what device is mounted to /media/

Let's prepare it for the fileserver
If you want to install multiple servers, just plug in more USB drives, fdisk and setup-bootable them.
But now we want to set up the USB drive for our file server. Shut down the PC/Laptop/Server you were using, plug in only the second USB drive (the one you just installed Alpine to) and boot it.
It should look exactly like the first USB drive we were using but now we can save changes we make to the system.
The first thing we're going to run is setup-alpine. Here's a small guide what to enter/choose
[your language code] us -> enter
[probably the same code again] us -> enter
[the hostname you want your machine to have] fileserver -> enter
[eth0] -> enter
[dhcp] -> enter (or you can configure static IP here)
done -> enter
[no] -> enter
[your password] -> enter
[password again] -> enter
[your timezone] Europe/Vienna -> enter
[none] -> enter
[chrony] -> enter
[1] -> enter
[openssh] -> enter
Which disks would you like to use: none -> enter
Enter where to store configs: usb -> enter
[/media/usb/cache] -> enter
(ignore the last warning)
Now you have successfully configured your image! To save changes you made to the system write .
lbu commit -d
To be able to connect to alpine from the network we need to either set up SSH to allow root logins (by editing /etc/ssh/sshd_config and setting PermitRootLogin to yes) or by adding your ssh keys to the authorized_keys file.
ssh-keygen # press enter until it's done
nano .ssh/authorized_keys # and add your SSH public keys in here
lbu include /root/.ssh # we need to tell alpine that we want to include the .ssh folder to the saved config on the USB
lbu commit -d # and saving to USB
You always need to run lbu commit -d after you changed any config file or installed a program otherwise it will be lost on reboot. To see which files are included run lbu ls
The idea for this is that the USB has all the programs and config but all data is stored on the mounted drives.
To confirm it really works, reboot the system and boot from the same USB again. If it needs your new password at login everything worked.
Now it can be plugged into the file server and booted. If you already have other disks in your server, make sure it's set to boot from USB. For my Data Vault I didn't have to (or would have been able to) change anything in the BIOS because if it can't find a boot partition on any disk, it will go straight to USB boot. Neat!
If you didn't set a fixed IP address then you'll have to do a lan scan
2. Utilizing all disks
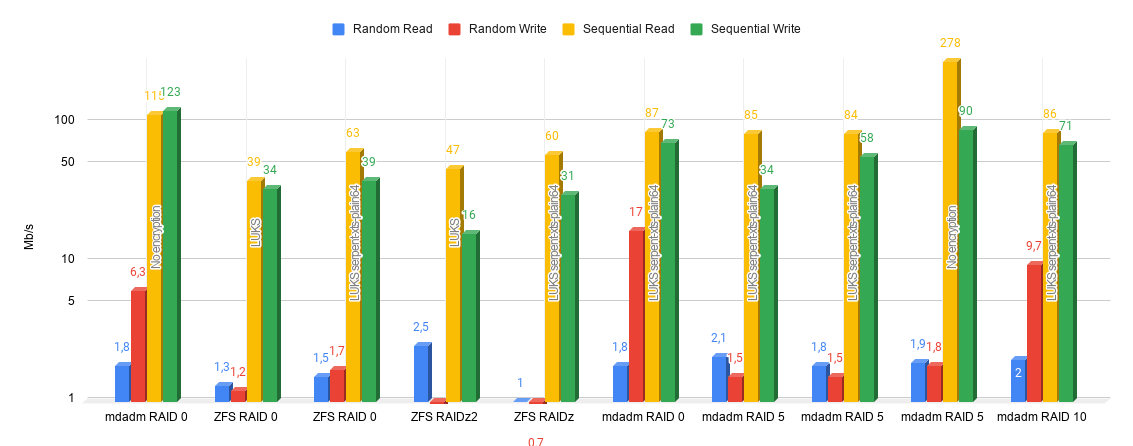
I did all the dirty benchmarking for you already. Here it is
Now that we have our system up and running it's time to add the drives and use them. But first let's install a few things that will make our lives easier.
apk add nano htop lsblk e2fsprogs
Let's look at the disk configuration we have: lsblk | grep disk
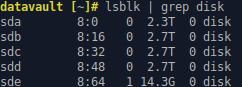
Awesome so we have 3x3TB and 1x 2.5TB disks (I'll change the smaller one when my new 3TB gets here)
From here it's basically a "choose your own adventure" thing. We have 4 drives so we can set them up in different ways.
My choice is: RAID 5 using mdadm and over the combined storage LUKS encryption. If you feel you won't need encryption you can just skip it. If your CPU is as old as mine and doesn't have the aes-ni extension, encryption will probably be bottlenecking file transfers but personally I just can't say no to an encrypted homelab.
Side note: ZFS
Alpine Linux fully supports ZFS. You can read this guide how to use it even with encryption on Alpine. Since ZFS requires a bit more CPU than mdadm I'll be using the latter but on my main file server at home I'm using ZFS as well.
Settung up RAID 5
First we'll going to need mdadm, we can install it using apk add mdadm
Then we`ll have to make sure it runs on boot using
rc-update add mdadm boot
rc-update add mdadm-raid boot
Let's create or RAID!
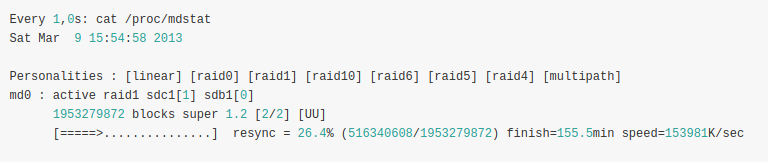
mdadm --create /dev/md0 --level=5 --raid-devices=4 /dev/sda /dev/sdb /dev/sdc /dev/sddDepending on your hardware and disk size it might take pretty long for the RAID to sync so you can watch it using watch cat /proc/mdstat
After it's finished, we can save the raid configuration info using mdadm --examine --scan > /etc/mdadm.conf and don't forget to lbu commit -d after doing so.
Ok so now you have to choose
a) No encryption
If you don't need encryption then you're almost done.
First we need to give the RAID device (/dev/md0) a file system and then mount it.
mkfs.ext4 /dev/md0
mount -t ext4 /dev/md0 /mnt
At this stage you should see the disk array when running df -h. Congratulations if you made it this far!
To automate mount on boot add the following to your /etc/fstab
/dev/md0 /mnt ext4 rw 0 0b) Using LUKS disk encryption
For testing purposes I'll be using a password for encryption but if you want your server to automatically unlock after boot, see this post I wrote about the subject: The encrypted homelab
openssl rand 512 | base64 -w 0 | tr -cd '[:alnum:]._-' | head -c 64

Now that we have our password, we encrypt the raid device
cryptsetup -v -c serpent-xts-plain64 -s 512 --hash sha256 luksFormat /dev/md0Then we'll have to unlock it (after every boot too, see my other post on how to automate it)
cryptsetup open /dev/md0 dataThe second parameter is now used as our new block device we can use. It creates /dev/mapper/data and we can now use it as if it were a normal hard disk.
So let's first give it a file system and then mount it
mkfs.ext4 /dev/mapper/data
mount -t ext4 /dev/mapper/data /mnt
Now you should see your fully encrypted data drive on /mnt (use df -h to check if it's mounted). Since you have to encrypt it before you can mount it, we can't add it to /etc/fstab but in my other post I explain how it can still be automated on boot.
3. Sharing the data in your network
We're going with the obvious solution here: Samba. That's linux powered windows shares which can be accessed by basically all operating systems.
First let's install the samba server and tell alpine linux to include the locatin where user passwords are stored. Also we'll exclude the socket folder of samba because it just has some temp files in it.
apk add samba
lbu include /var/lib/samba/private/
lbu exclude /var/lib/samba/private/msg.sock/
Now we need to add a user so we don't have to do everything with the root user
useradd chris      # creating the user
smbpasswd -a chris # setting it up so samba can authenticate against it
chown chris /mnt   # setting the new user as owner of the mounted drives
Now let's delete everything in /etc/samba/smb.conf and replace it with this:
# /etc/samba/smb.conf

[global]
    workgroup = WORKGROUP
    dos charset = cp850
    unix charset = ISO-8859-1
    force user = chris

[data]
    browseable = yes
    writeable = yes
    path = /mnt
Lastly we tell samba to start on boot, start samba and then save the configuration to the USB drive again. If you chose the encryption method before, the samba service should not be set up to start automatically but after unlocking of the devices.
rc-update add samba
rc-service samba start
lbu commit -d
Now you should be able to use a windows computer and go to the location \\ip.of.your.server\data and see your share after logging in with the newly created user.
For linux you can probably use the path smb://ip.of.your.server/data
An alternative to Samba would be NFS but it's harder to get that to work with Windows.
4. Docker
You now have an awesome file server that can share data across your network. But what else can we make it do? Well docker is the obious choice here if you want to use your server for more than just files.
First edit /etc/apk/repositories and comment out the third line (ending in community) since docker is a community package.
apk update
apk add docker docker-compose
But now we have a small problem with our RAM disk. As I said everything that's not included on the USB drive will be lost on reboot. This also includes everything in /var where docker stores info on which containers are on the system and their states. The obvious choice is the wrong one: We cannot and should not add /var/docker to the USB because docker data changes so quickly that we'd have to automate the sync and then we're throwing away all advantages of this RAM disk setup.
What we're going to do is much smarter: We'll move the data directory to our RAID volume and run it from there.
Alpine has a service called local which allows us to run scripts on boot so we'll be using this to symlink the docker data dir to our array.
If you chose the encryption method and you followed my guide on how to automate things, you'd just add this to your decrypt.sh instead of onboot.start
rc-update add local     # enabling the local service on boot
touch /etc/local.d/onboot.start
chmod +x /etc/local.d/onboot.start
mkdir -p /mnt/docker
Inside /etc/local.d/onboot.start
#!/bin/sh
ln -s /mnt/docker /var/lib/docker
rc-service docker start
Don't forget to lbu commit -d and then reboot and check if the array is available and docker is started.
S3-like Object Storage?
If you want to use your file server as a object storage like Amazon S3, you can download and install Minio which does exactly that.
The possibilities are almost endless and depending on your hardware you can use it for more than just storing files.
Frequently Asked Questions
1. Why not use Unraid or FreeNAS, etc?
I never got fond with the existing solutions because either they charge you for things you can do for free, are bloated, lack features or require more modern hardware. Also you can learn so much from setting up your fileserver yourself without finished solutions like FreeNAS, etc.
2. How is this setup easier than others?
It's not and I didn't claim it would be ea.sy. My premise was that it's the perfect setup in regards with optimal use of resources and encryption but of course it's harder to set up than use a NAS or NAS distro
3. Why would it make sense to use encryption on your file server?
Multiple reasons. For example I had a police raid happen to me because someone sent me a link and I stupidly clicked it. All my computers were seized and analyzed over a year. The police said if I would have used encryption they'd given them back much sooner because they had to look through all files, videos, but if they can't open it, they couldn't have done anything (since in Austria you can't be forced to give them your passwords).
Also if your equipment gets stolen or inherited, the new owners can't go through your data which might be desirable.
But of course if you have strong servers and one weak (in terms of CPU power) file server for backups, it might make more sense to have in unencrypted and encrypt backups before storing it on the NAS. This could have beend a viable solution for me too, but I wanted to be able to rsync folders directly so I encrypted the whole thing.
4. What if my server dies? Is the data lost?
No, unless the whole thing goes up in flames. The awesome thing about our setup is that if you take the USB drive and your haddisks and put them in another machine, it should work out of the box again. Even if your USB would fail, no data will be lost as you will be able to just re-create the USB and run mdadm --assemble --scan which will tell mdadm to look for arrays in disks and will re-create them.
This also means you can upgrade your hardware at any time without losing data. Something that would be harder if you had a hardware RAID card.
5. What if a disk dies?
Our setup uses RAID 5 meaning one disk can fail without data loss. If that happens you should replace the disk as soon as possible.

Comment using SSH! Info